GETTING STARTED · VALLEY CABINET STUDIO
Your first project, step by step
Follow a project from room setup to reviewed documents. The current screenshots use Aurelia, our editable test project; you can follow the same steps in a new project.
Use the four workspace stages: Project Start, Design, Review and Project Management. Open Project controls in the compact drawing workspace to switch stages, rooms, Master finishes or Bulk Drop. Screenshots are beta examples captured on 14 October 2026; some controls may have changed. Example dimensions and prices are not a quotation. Available workspaces depend on your plan; the 14-day Starter trial does not include every chapter below.
01 / Project Start
Site measure
Start by choosing a room in your project. This page is your measuring notebook.
Check width, length and ceiling height. Add wall notes and site photos, then use Set current as baseline when you are happy with the measurements.
What the buttons mean
- Upload site files
- Keep site photos or drawings with this room.
- Set current as baseline
- Save a measuring point to compare future changes against.
- Wall measurement notes
- Write anything the fitter should know about each wall.
02 / Project Start
Project standards
Think of this as your recipe for all the cabinets. Set it once before you start drawing.
Choose the room shape, materials, fronts, finishes and sizes. If Bedroom 3 needs a different finish, choose Room overrides; the other rooms keep the project defaults. Press Continue to design.
What the buttons mean
- Project defaults
- The starting choices for the whole job.
- Room overrides
- Change only this room.
- Continue to design
- Move to the drawing page.
03 / Design
Layout
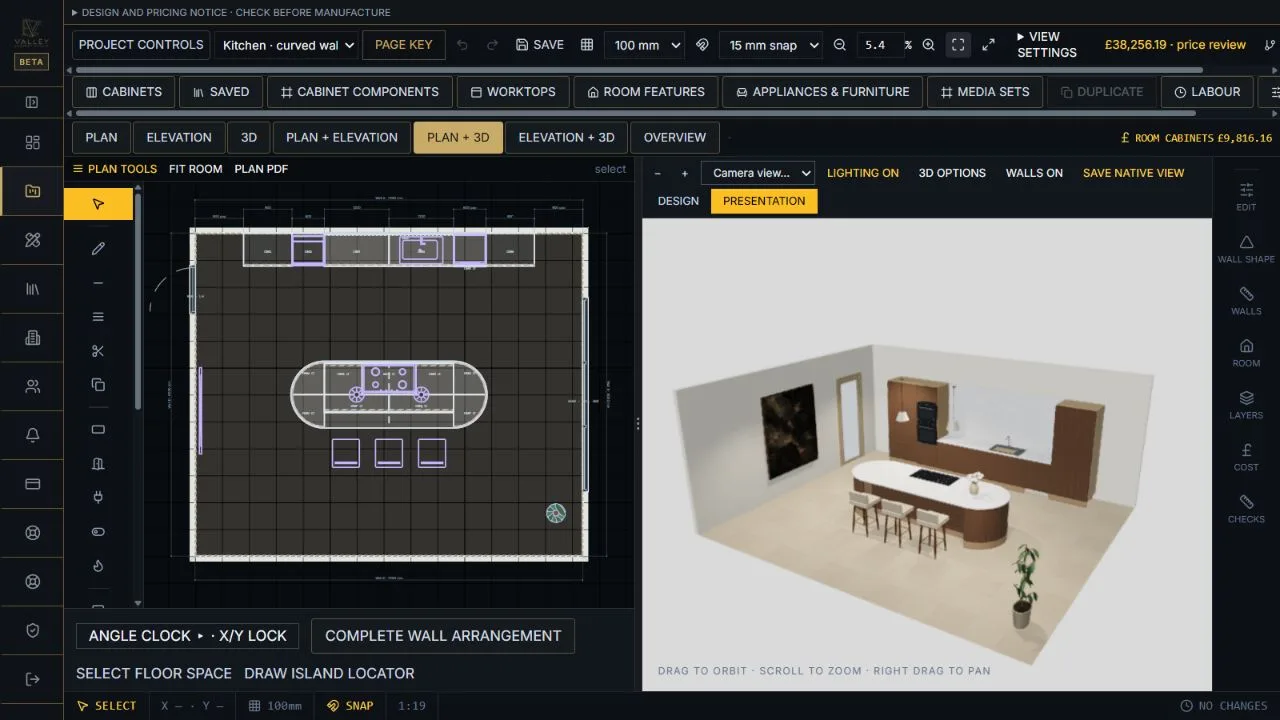
This is the drawing table. Pick a room, then draw the space and place the units where they belong.
Use Plan to see the room from above. Choose a wall, add a cabinet from Cabinets, then select it and enter exact millimetres. Switch to Elevation to see the front of that wall. Save and wait for Saved.
What the buttons mean
- Cabinets / Saved
- Add a new starter unit or one you saved earlier.
- Worktops / Room features / Cabinet components
- Add tops, room details or finishing pieces after the main units.
- Plan / Elevation / 3D / combined views
- Look from above, look straight at a wall, or compare with a model.
- Save / Undo / Redo
- Keep your changes, step back, or bring a change back.
- Grid / Snap / Fit
- Show guides, make items line up, or bring the drawing back into view.
04 / Design
Bulk Drop
Place an editable run of cabinets from a wall datum.
Open Project controls, choose Bulk Drop, select the wall and left-hand or right-hand start. Enter the distance to the first unit, then add units with widths, heights, depths and gaps. Enable Upper / stacked run to set a separate mounting height. Check the preview and resolve any conflicts before Place run. Wait for the saved confirmation; Undo removes the complete run.
What the buttons mean
- Base / tall run and Upper / stacked run
- Set separate start offsets and mounting heights.
- Place run
- Validate and save the complete run together.
- Advanced · JSON import
- Use the validated importer for technical workflows; ordinary users can use the unit rows.
05 / Design
Cabinet details
Pick one cabinet to open its own little workshop. You can change one unit without starting the whole room again.
Set its size and construction, choose its openings and shelves, then choose doors, finishing panels and materials. Look at Manufacturing last to see the parts it will make.
What the buttons mean
- Size & construction
- Set the body and its measurements.
- Openings / Inside
- Split the cabinet and add shelves, rails or spaces.
- Doors & drawer fronts / Finishing panels
- Choose the front and the finishing pieces.
- Materials / Manufacturing
- Choose what it is made of, then review the parts.
- Closed / X-ray / Hidden / Explode
- Change only how the model looks while you inspect it.
06 / Project Management
Audit / BOQ
Before showing the job to anyone else, ask the app to look for problems.
Press Run audit after everything is saved. Open each finding, correct the design, and run it again. A green result is helpful, but a person must still check site sizes and every drawing.
What the buttons mean
- Run audit
- Check the saved whole project for issues.
- Save audit JSON / Print audit
- Keep a copy of the findings.
- Open in design
- Jump to an item that needs attention.
07 / Review
3D review
Inspect the saved model without changing the furniture.
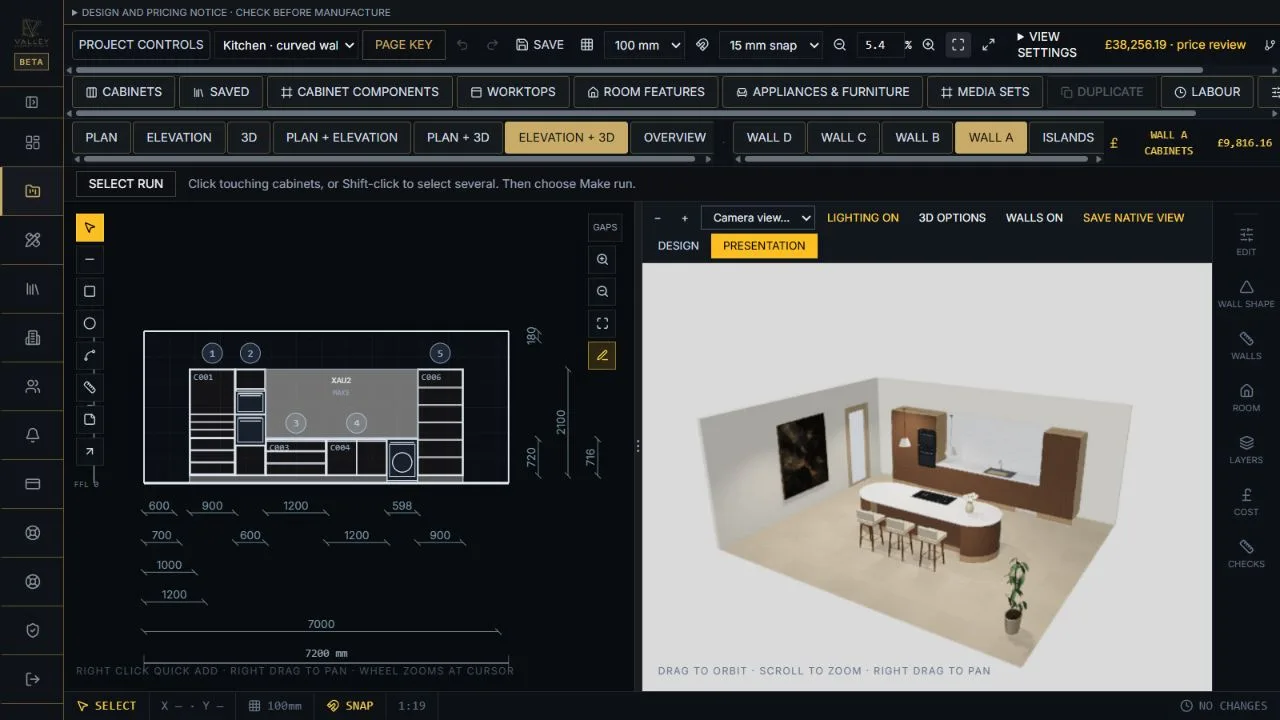
Use Front or Corner for a quick camera angle. Drag to turn the room; scroll to zoom. Try Fit 3D if the model disappears. Open 3D options for door display, ceiling, lighting, sections and visibility. Narrow split panes put Front, Corner and Fit in the Camera view menu.
What the buttons mean
- Front / Corner
- Choose a viewing angle.
- Fit 3D / Fit furniture
- Bring the room or furniture back into view.
- 3D options / Walls on
- Change what you can see.
- Save native view
- Save a view made from the actual model.
08 / Review
Photo render
Native saved-model views are available. Optional Studio AI concepts send selected views, drawings and model details to the hosting body’s AI service. Review its terms and privacy policy before generating. Results are illustrative and must be checked against the native model.
Choose Accurate model renders to capture the real saved shapes, then select a room and camera view. For optional Studio AI concepts, review the processing notice and select its checkbox, then generate from a saved native view or drawings. Check every result against the native model.
What the buttons mean
- Accurate model renders
- Capture a view from the saved model.
- Studio AI render
- Optional Studio AI concepts send selected views, drawings and model details to the hosting body’s AI service. Review its terms and privacy policy before generating. Results are illustrative and must be checked against the native model.
- Primary camera elevation
- Choose the saved-model camera direction.
09 / Project Management
Quotation & acceptance
This is where your drawing turns into something you can show a customer.
Look through the room drawings and cabinet views. Pick the quote scope, check the price and wording, then save a revision before printing or sending it. Keep private costs out of customer pages unless you choose otherwise.
What the buttons mean
- Quote scope
- Choose a room or the whole project.
- Drawing detail / Show doors
- Choose how much to show on the drawings.
- Visible prices
- Choose a simple total or more detailed prices.
- Save quote / Print / PDF
- Keep a version and make a document to review.
10 / Project Management
Parts & materials
A take-off is a shopping and cutting count made from the cabinets.
Choose Room or Whole project in Scope. Read the panels, fronts, hardware, worktops and totals. If the page says output is blocked, go back and fix the design before printing.
What the buttons mean
- Scope
- Show this room or the entire job.
- Fabrication cutting list
- See the parts and their sizes.
- Make the list only when the checks allow it.
11 / Project Management
Cutting layout
Imagine fitting your wooden parts onto sheets like puzzle pieces.
Check the saw cut width and edge trim. Keep grain locked for visible fronts. Look at the sheets and warnings; then download the cut list or export when it is ready.
What the buttons mean
- Saw kerf / Edge trim
- Leave enough room for cutting and trimming.
- Lock grain
- Keep the visible wood pattern running the right way.
- Rotate part
- Turn a selected part when the grain rules allow it.
- Download cut list / Export nested sheet geometry review DXF / Print nesting sheets
- Review sheet-panel outlines after geometry checks. The DXF has incomplete fitting and joint machining and is not a machine program. Supported worktop member faces use canonical geometry; unresolved curved or folded members remain blocked.
12 / Project Management
Production
Here the workshop can see what it is meant to make.
Read the readiness panel first. Open Preview shop pack to inspect drawer schedules, part labels, cabinet working sheets, worktop drawings or island drawings; choose Complete shop pack to combine them. Preview does not grant release approval. When the job is approved and ready, print the selected section or export CNC parts. Check sizes against the drawings before any machine cuts material.
What the buttons mean
- Production readiness
- Shows what still needs checking.
- Open quote acceptance
- Go back if approval is missing.
- Export CNC parts & worktops (DXF)
- Create machine drawing files when release is allowed.
- Print shop pack
- Print the drawer, edge and part schedules.
13 / Project Management
Installation pack
This is the fitter’s checklist for putting the pieces into the house.
Choose the right room, check each unit’s wall, set-out distance, height and fixings, then use Print / PDF. The fitted and checked boxes are for site sign-off.
What the buttons mean
- Print / PDF
- Make a site copy.
- From left / AFF
- Measure from the wall’s left end / above finished floor.
- Fitted / Checked
- Tick off work as it is installed and checked.
14 / Project Management
Schedule & tasks
This page is your simple to-do list for the whole job.
Add a task, choose its stage, person and due date. Change its status as work moves along. The project schedule shows the overall dates and progress.
What the buttons mean
- Add task
- Put a new job on the list.
- Todo / In progress / Done / Blocked
- Say what is happening with that task.
- Utilities · project recovery
- Download the recovery archive. Restore as a recovered copy preserves the original project.
15 / Project Management
Business
All the paperwork lives behind one tab, so you do not need to make it twice.
Start on Overview, then open the tab you need. Check the numbers before raising any order or invoice. Some tabs depend on your plan.
What the buttons mean
- Overview
- See the job at a glance.
- Quotation
- Prepare and save the customer quote.
- Procurement
- See what materials and fittings need ordering.
- Purchase orders
- Raise an order for a supplier.
- Delivery & packing
- Print a tick-box list of items to load.
- Invoicing
- Raise and track stage invoices.
- Snagging
- Keep a list of small things to put right.
16 / Outside the project
Libraries & organisation
These pages hold the starting blocks that you can use again on future jobs.
Open Libraries to find or edit cabinet masters, materials and fittings. Open Organisation to add Your company name, your own logo and document wording so new paperwork belongs to your company.
What the buttons mean
- Choose a category / Edit master
- Find a cabinet style and adjust the library copy.
- Reviewed 3D library
- In Design, open Appliances & furniture and choose Reviewed 3D library. Search the 104 reviewed assets by category or name.
- Place visual / Place reference
- Add a static model with its original materials. Position, rotation, visual size and height above the floor remain editable; static models and complete layouts are excluded from manufacturing outputs.
- Build editable cabinet
- Where available, build a supported native cabinet from the reference. Edit its construction, doors, shelves and hardware with the cabinet tools; scaling a static mesh does not make it manufacturing-ready.
- Identity / Presentation
- Set Your company name, your story and presentation images.
- Terms & references / Document library
- Manage your usual paperwork and reference documents.
Drawing and library tools · 17 October 2026
Choose products before purchasing suppliers. Design libraries group matching physical specifications and exact hardware variants. Add the product name, dimensions and reference cost; choose a supplier from your organisation directory when ordering. Existing project prices and accepted quotation snapshots stay separate from later library changes.
Hardware drawings and models. Open Libraries → Fittings to browse the available exact-code SVG views and 3D assets. Check the manufacturer, article, handing and runner length. An available model is a visual reference; it does not confirm installation datums, drilling or movement. Missing specifications remain visible for review before manufacture.
Sections and X-ray context. Use Sections · X / Y in Layout to save a plan or elevation cut, its position and viewing direction. Each saved cut creates a page with the source drawing beside its physical section. Stronger lines show the cut; lighter dashed lines show remaining modelled geometry beyond it. Building wall and opening solids are not included in the physical joinery section.
Notes, measurements and zoom details. Open Drawing markup on a drawing page and choose the view. Measurements snap to straight edges and endpoints; hold Alt to bypass snapping. Use Circle / zoom detail to choose the source area, then drag the source ring or destination frame independently. Edit the source centre, radius, frame size, position, zoom and label in the inspector. Save & close before exporting. Retained notes with a geometry-change advisory need review against the current drawing.